Garage shelving should be durable and suitable for your garage. SafeRacks shelving can be used to store heavy items without them bending or warping. To maximize storage space, multiple shelves can be connected together. They are durable and attractive due to their powder-coated finish.
They can also be installed against a wall for extra safety. These lag bolts, which are cheap and can support up 250 pounds, are the best choice. The shelf can be moved around and cause damage to walls if it isn't secured. The lag bolts can penetrate the concrete, so be sure to anchor the shelf properly. Failure to do so can lead to the shelf breaking.
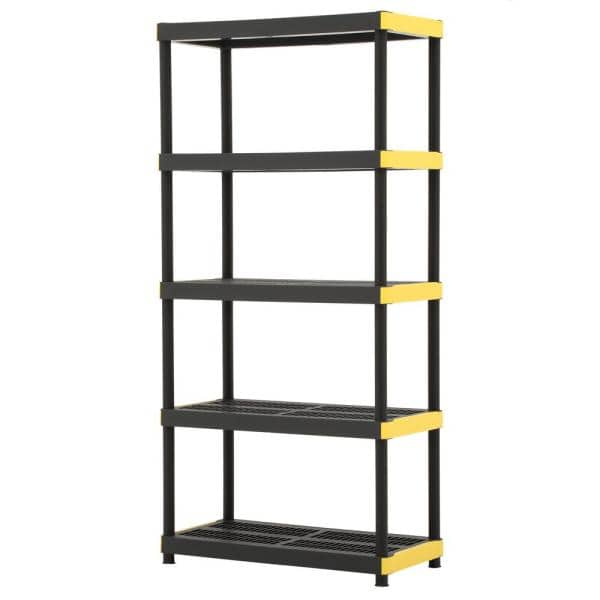
Although wire shelving can be a great way to hold heavy items, it is worth considering a mat or liner. This will protect your metal and prevent it corroding. You can also add caster wheels for portability. However, this may reduce the shelf's capacity.

Some shelves can be made adjustable to help you organize your garage. These shelves allow you to place items in the most convenient places, but be aware that they might not be designed to carry heavy loads. In addition, you might not have the right tools for assembling the unit. It is best to get help from a friend when you are assembling the shelf. You can ask a friend to help you secure the unit in the wall.
Another option is mounting the unit on the ceiling. This is a simple way to organize your garage. However, this can lead to a cluttered garage. It is important to inspect the shelving every month. You should also inspect the screws for cracks and damage. These can be repaired using epoxy or drilling new ones.
Wall-mounted shelving offers a great storage solution for homes. This shelving is easy to mount on any wall, and doesn't take up much space. It can be used to store parts or cars. They are not recommended for use in industrial settings.
The shelves can be mounted on wood studs. The studs should be about 18 or 24 inches apart. To mark the spots, use a template. After you have found the holes, drill the holes. After drilling the holes, you can use a screwdriver to hammer them in or a rubber mallet.

A leveling foot can be used for garage floors with uneven surfaces. These feet will make sure that your shelves don't slip and stay level. It is important not to mount shelves too high. If you do, the shelves may be too close or even touch the floor.
CX shelving is a solid choice for those looking for an affordable storage solution. They're made from recycled plastic and offer adjustable feet for increased stability. Additionally, they have snap-in fasteners for a clean look.
FAQ
How much would it cost to gut a home vs. how much it cost to build a new one?
Gutting a home removes everything inside a building, including walls, floors, ceilings, plumbing, electrical wiring, appliances, fixtures, etc. It's usually done when you're moving into a new place and want to make some changes before you move in. Gutting a home is typically very expensive because so many things are involved in doing this work. Your job may require you to spend anywhere from $10,000 to $20,000 to gut your home.
Building a home means that a builder constructs a house piece by piece, then adds windows, doors, cabinets and countertops to it. This is usually done after buying a lot of lands. Building a home is typically cheaper than renovating, and usually costs between $15,000-30,000.
It really depends on your plans for the space. If you want to gut a home, you'll probably need to spend more because you'll be starting over. You don't need to take everything apart or redo everything if you are building a home. You can build it the way you want it instead of waiting for someone else to come in and tear everything up.
How long does it usually take to remodel your bathroom?
Two weeks typically is required to remodel a bathroom. This depends on the size and complexity of the project. Smaller jobs, such as adding a shower stall or installing a vanity, can be completed in a day or two. Larger projects, such as removing walls and installing tile floors, and plumbing fixtures, can take several days.
The rule of thumb is that you should allow three days for each room. You would need 12 days to complete four bathrooms.
What is included in a full kitchen remodel?
A kitchen remodel includes more than a new faucet and sink. You can also get cabinets, countertops or appliances, as well as flooring and plumbing fixtures.
Full kitchen remodeling allows homeowners to make small changes to their kitchens. This means that there is no demolition required, making the process easier for both homeowner and contractor.
A kitchen renovation can include a variety of services such as plumbing, HVAC, painting, drywall installation, and electrical. A complete kitchen remodeling project may require multiple contractors depending on the size of the job.
It is best to work with professionals who have experience in kitchen remodeling. Kitchen remodels often involve many moving parts, and small issues can cause delays. If you choose a DIY approach, make sure you plan and have a backup plan in place in case things go wrong.
How do I determine if my house requires a renovation or remodel?
First, you should look at whether your home has been updated recently. You might want to renovate if you haven’t had any home updates in several years. A remodel may be a better option if your house looks like new.
You should also check the condition of your home. It's possible to renovate your home if there are holes in the walls, peeling wallpaper or damaged tiles. If your home is in good condition, it might be worth considering a remodel.
Another factor to consider is the general state of your home. Are the structural integrity and aesthetics of your home? Do the rooms look good? Are the floors clean? These are essential questions to consider when choosing the type of remodeling you want.
Are there any savings on a remodel of a bathroom or kitchen.
Remodeling a bathroom or kitchen can be expensive. It might be more cost-effective to upgrade your home than you think, given how much you spend each month on energy bills.
You could save thousands each year by making a small upgrade. A few simple changes, such as adding insulation to walls and ceilings, can reduce heating and cooling costs by up to 30 percent. Even a simple addition can increase comfort and reduce resale costs.
Remember to choose durable and easy-to maintain products when you are planning your renovations. Materials such as porcelain tile, stainless steel appliances, and solid wood flooring last longer and require fewer repairs than vinyl or laminate countertops.
It is possible to reduce utility costs by replacing older fixtures with more modern models. By installing low-flow faucets, you can lower your water usage up to half a percent. Compact fluorescent bulbs can be replaced with inefficient lighting to reduce electricity consumption by as much as 75 percent.
Is $30000 sufficient for a kitchen remodeling project?
The cost of a kitchen remodel can vary from $15000 to $35000, depending on the amount you spend. You can expect to spend more than $20,000. If you are looking for a complete overhaul of your kitchen, it will cost more. If you are looking to upgrade appliances, paint or replace countertops, it is possible to do this for less than $3000.
Full-scale renovations typically cost between $12,000 and $25,000. There are many ways to save money and not compromise on quality. You can replace an existing sink with a new one for around $1000. Or you can buy used appliances for half the price of new ones.
Kitchen renovations can take longer than other types projects so plan ahead. You don't want your kitchen to be finished halfway through.
The best thing is to get going early. Begin by looking at all options and getting estimates from multiple contractors. Then narrow down your choices based on price, quality, and availability.
Once you have contacted a few contractors, ask them for estimates and then compare prices. Sometimes the lowest bid doesn't necessarily mean the best. It is important to find someone who has similar work experience and will give you a detailed estimate.
Be sure to take into account all additional costs when you calculate the final cost. These extras could include labor and material costs, permits, or other fees. Be realistic about how much you can afford and stick with your budget.
Don't be afraid to tell the contractor what you think about any of the quotes. If you don’t like the first bid, let the contractor know and offer to give it another chance. Don't let pride get in the way when you save money.
Statistics
- About 33 percent of people report renovating their primary bedroom to increase livability and overall function. (rocketmortgage.com)
- $320,976Additional home value: $152,996Return on investment: 48%Mid-range average cost: $156,741Additional home value: $85,672Return on investment: (rocketmortgage.com)
- Windows 3 – 4% Patio or backyard 2 – 5% (rocketmortgage.com)
- 57%Low-end average cost: $26,214Additional home value: $18,927Return on investment: (rocketmortgage.com)
- 55%Universal average cost: $38,813Additional home value: $22,475Return on investment: 58%Mid-range average cost: $24,424Additional home value: $14,671Return on investment: (rocketmortgage.com)
External Links
How To
How to Remove Tile Grout From Floor Tiles
Most people don’t know what tile grouting is. It is used to seal the joints between the tiles. There are many types available today. Each is used for a specific purpose. Here we will show you how to remove tile grout from floor tiles.
-
Before you can begin the process, ensure that you have all necessary tools. It would be best if you had a grout cutter, a grout scraper, and some rags.
-
You will now need to clean off any dirt and debris that may have been under the tile. Use the grout cutter to cut away at the grout and gently scrape away any loose pieces. You should not damage any tiles.
-
After cleaning up all the grout, you can use the grout scraper to remove any remaining grout. If you don't have any grout, you can continue to step 4.
-
After you have done all the cleaning, you can move on to the next step. Soak one of your rags in water. You want to make sure that the rag gets completely wet. To ensure that the rag does not absorb water, dry it.
-
Then, place the wet towel on the joint where tile meets wall. Continue pressing down on the rag until you see the grout begin to fall apart. Slowly pull the rag toward you, and keep pulling back and forth until all of the grout is gone.
-
Continue to repeat steps 4 and 5, until all grout has been removed. Rinse the ragout. Repeat the process if necessary.
-
When you are done removing grout, clean the tiles using a damp cloth. Allow to dry completely.